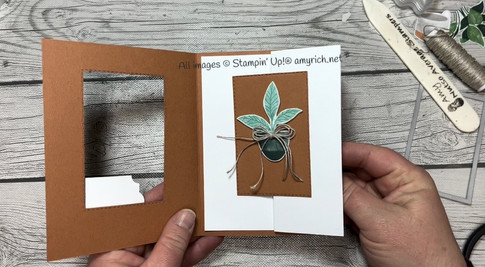
Sometimes not everything goes as planned. This happened to me Wednesday when I was Live on Facebook during What's Up! Stampers? I had a fantastic card planned for my demonstration, but as I put it together I realized the fun fold was not going to work like I intended it to work. But, as I struggled through the card, I decided to put the card together into a different fun fold card and called it good. Here was the first - the "wrong" - card I made:

And the fun fold is pretty dang cool. The opening in the front of the card is important. Adhere the Designer Series Paper (DSP) to the front of the folded card base, adding adhesive ONLY around the outside of the DSP. Cut the hole out of the front of the card using the Stitched Rectangles Dies, and discard the DSP rectangle you cut out. Keep the Cinnamon Cider piece to insert back into the front of the card later. Here is how I put that first card together:
For this card, I used the following paper:
Cinnamon Cider cardstock:
-5 1/2" x 8 1/2"
Bloom Where You're Planted Designer Series Paper:
-4" x 5 1/4"
-Plants (fussy cut)
Basic White cardstock:
-8" x 5 1/4", scored at 2" and 4"
This is the cardstock where I went wrong with the card.
After the Live event was over, I worked out what the card was supposed to look like, then took pics along the way so that I could share the process with you. The biggest thing I screwed up in my first card was the Basic White cardstock. I actually needed a piece 6" x 5 1/4", scored at 2" and 4." This allows the card to open as I wanted and also allows the mechanism to work. Fold this piece accordion style and adhere it to the inside of the card as shown.
When that Cinnamon Cider stitched rectangle is put back into the front of the card (and adhered JUST on the white section as shown above). Grab the card by the rectangle with your left hand to open it really fancy style.
In the end, I made the best of a screw up by making two pretty sweet cards.

For a list of supplies I used on these cards and links to my online store, see below.
Stamping Blessings!
Amy


Comentários